The number one question I get is- How do you color your paper dolls?
And my usual answer is- Photoshop and the BPelt filter.
Still, I keep getting the question, so clearly that answer does not satisfy.
So, this post aims to illustrate the steps that go into the average paper dolls coloring and to answer questions I get about the process I use to make paper dolls. In other words, this is how I color paper dolls. Hopefully, you’ll find some of it interesting and useful, or at least fun to look at.
I’ve tried to include everything someone would need to copy the way I do things, but I’ve been doing this for a long time and I might forget to say something important. So, bear with me as I try to show how I do things with lots of screen captures and a sneak peek of Coastal Princess’s colors.
Assumptions:
1. You already have Photoshop (I use CS3, but others will work) and you have installed the BPelt Flatting Plugin for Photoshop, available here for free.
2. You have an image you’ve scanned and cleaned up that you want to color. That image must contain only black and white. If there is ANY other color in the image, this process won’t work.
So, armed with an image saved in black and white, we begin the epic battle with the world of coloring paper dolls… Fortunately, short of paper cuts, we should be okay.
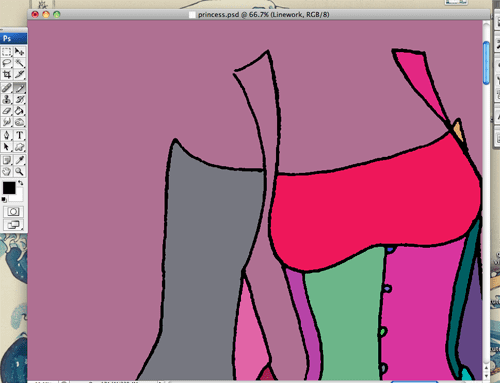
Step 1: The Image

Here is my image. It’s a black and white scan, saved to the Background Layer. The image is 600 dpi, at the moment. I work at a very high resolution. It’s set as the background of the Photoshop file.
This image contains nothing, but black and white. BPelt gets upset if there is grey in the image.
Step 2: Create a Linework Layer
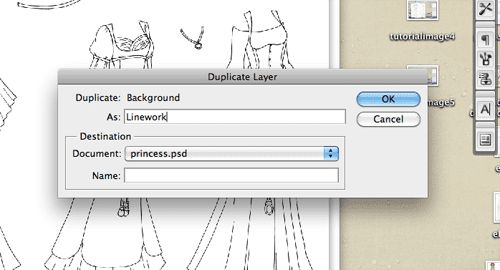
Using Layer –> Duplicate Layer, I duplicate the Background layer and name it something like Linework. This is the layer I’ll be mostly working with. You can name it anything you like. Maybe George… George is a nice name.
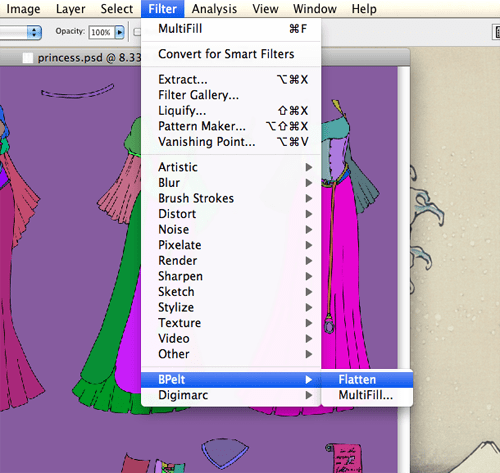
Step 3: Using the BPelt Filter- Multifill
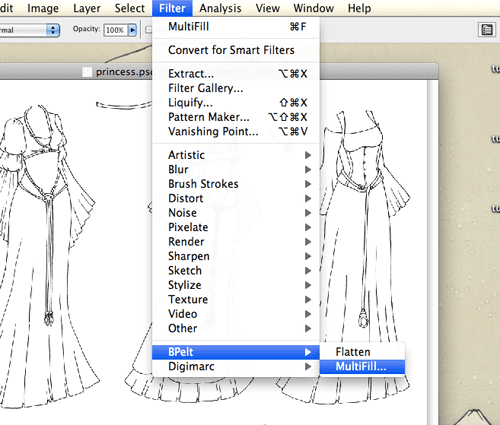
BPelt has two settings, MultiFill and Flatten. The way the MultiFill works is that it selects each area entirely enclosed in black lines and gives it a different color. The Flatten plug-in expands all these area’s until they meet and no black line-art is left in the layer. Since I’ll be recoloring the MultiFill layer, I don’t want there to be any gaps in the line work, so I check using the Multifill setting which can be found under the Filters–>BPelt.
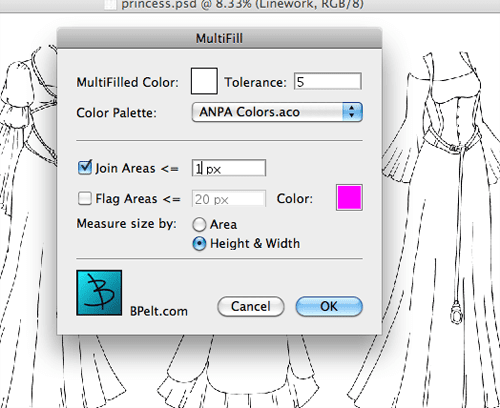
These are the settings I use when I Multifill.
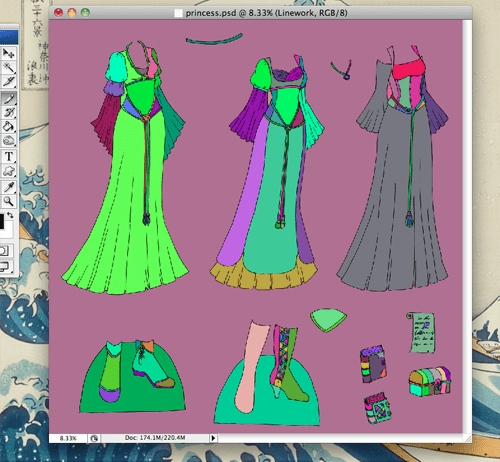
The resulting image looks like this. As you can see there are some areas that are the same color. This means there’s a gap line the line work. So, I go back and I fix it.
And here is a picture of my gap. One of several, as it turned out. I repeat the process until all of the gaps are gone. Sometimes this take several tries. If you’re following along at home, you’ll want to Undo the Multifill before you correct the line-work. Once all the line work is corrected, save the document.
Step 4: Creating a Colorwork layer
Before using the Flatten filter on BPelt, I duplicate the Linework layer and create a new layer called Colorwork. At this point, there are three layers- Background, Linework and Colorwork. Each of these layers should consist of nothing but the black and white image. They should all look pretty much alike. Now I save the file, again.
I forgot to take a picture of this part. Opps.
Step 5: Color Begins…
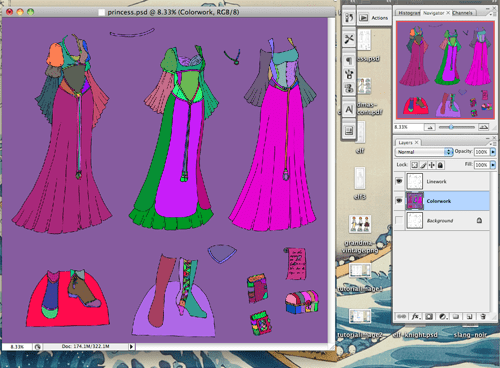
Selecting the Colorwork layer, I run the Multifill Filter as before. Every section should be a different color, than I run the Flatten filter.
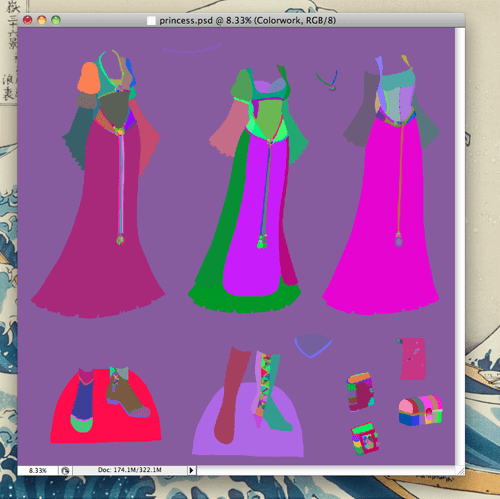
The Flatten filter expands the Multifill until the color covers the line work. I now have a layer without line work and a layer with line work. At this point, I usually make sure to save my file and take a break.
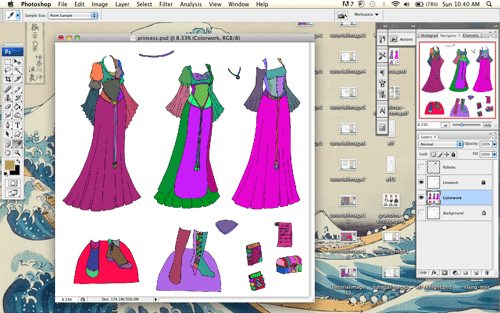
Step 6: Setting up the Layers
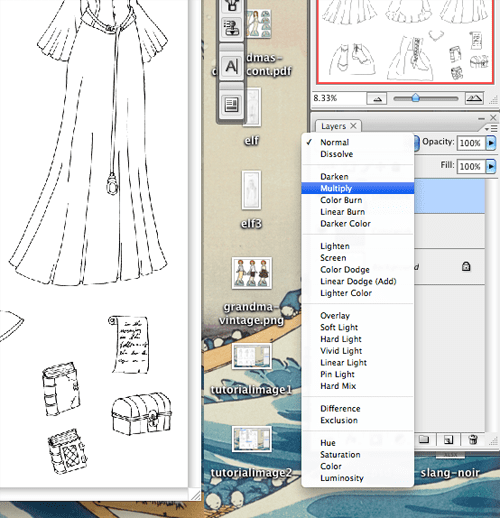
I move my Colorwork layer to below my Linework layer. I change the Linework layer settings to Multiply. This makes all the white on the Linework layer transparent. Than I lock down the layer from further editing. The settings are at the top of the layers list in Photoshop CS3.
Step 7: Creating a Palette Layer
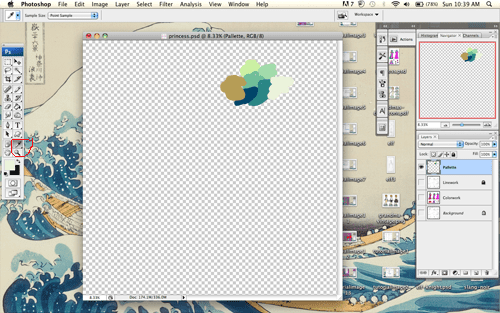
I like having the colors I want to use on a separate layer, so I can use the Eyedropper tool to select them. So, I create a layer name Palette and put on it all the colors I think I need for the paper doll set. Here they are. Clearly, I’m using Coastal Princess as my example.
Step 8: Coloring…
Now, I select the Colorwork layer and begin color. I like to do all the white parts first.
Once all the white parts are done, than I begin to use the Eyedropper tool and select the colors from the Palette layer to color all my dresses. It’s a pretty slow process, but also fun because I get to see the colors on the clothing.
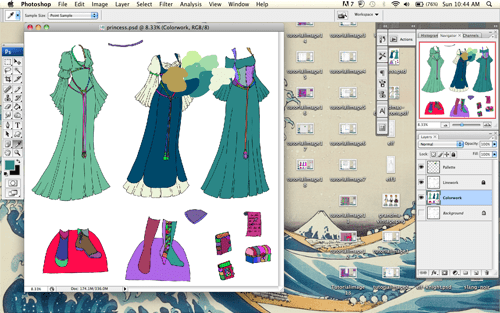
And there is the set partway finished. So, I work until everything is colored and than I smooth up the line work on the Linework layer, merge everything, reduce it all in size, add tabs, add a black frame, and reformat it before posting.
Okay, so maybe the post processing could use a tutorial as well…
Questions? Comments? Let me know. And stay tuned for the finished Coastal Princess posting next week.
Discover more from Paper Thin Personas
Subscribe to get the latest posts sent to your email.
wow thats really cool i liked seein ghow you colored your paper dolls i also like getting the sneek peek of how costal princess will be colored i can’t wait to see it next week!
Wow! This ROCKS! Thanks so much! I’ve been using a free version of Photoshop called Ribbet Advanced Editor and I am just beginning to use layered images in coloring my paperdolls. This tutorial actually helped me a lot. I plan to refer back to it, the next time I create a paper doll. 🙂
P.S. And thanks for the compliment on my little girl paperdoll.
Thanks guys. Doing all those screen captures was not exactly fun… but I’m glad it might have helped someone. 🙂
Wow! That looks like a lot of work! My process is very different (in Photoshop as well)…or at least I think. I’ve never tried the pallet thing, that sounds helpful. I may have to give that a try someday. Interesting to see how someone else goes about doing this…as in Photoshop I think there are probably endless ways to go about accomplishing one thing! It still amazes me when I have an aha moment, realizing something I’ve been doing for so long could I’ve been done so much simpler!
Photoshop is such a powerful program. I learn from others on how to use it all the time and I am still learning.